Also, when working with 3d models imported from sadx, make sure you leave the 'rotate model' option unchecked in your obj import and export plugin. This will cause the viewports to be inaccurate, but our x,y,z coordinates will be accurate for object placement because of this.
After ripping the desired data using sadx, navigate to the section of the level you'd like to change, for this example, we will be moving the island immediately after the first loop as pictured here:

Now, using the top (back) view, lets select the island's parts. Notice the island is cut into 15 objects, as seen here:
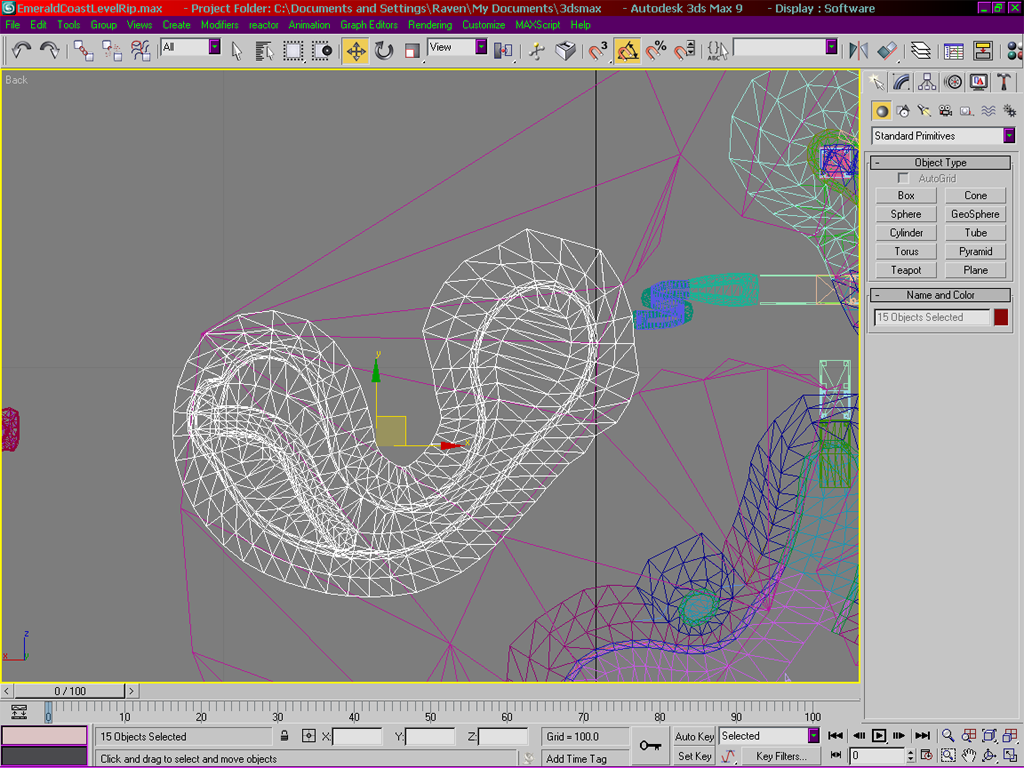
Now, lets move and rotate those pieces like so:
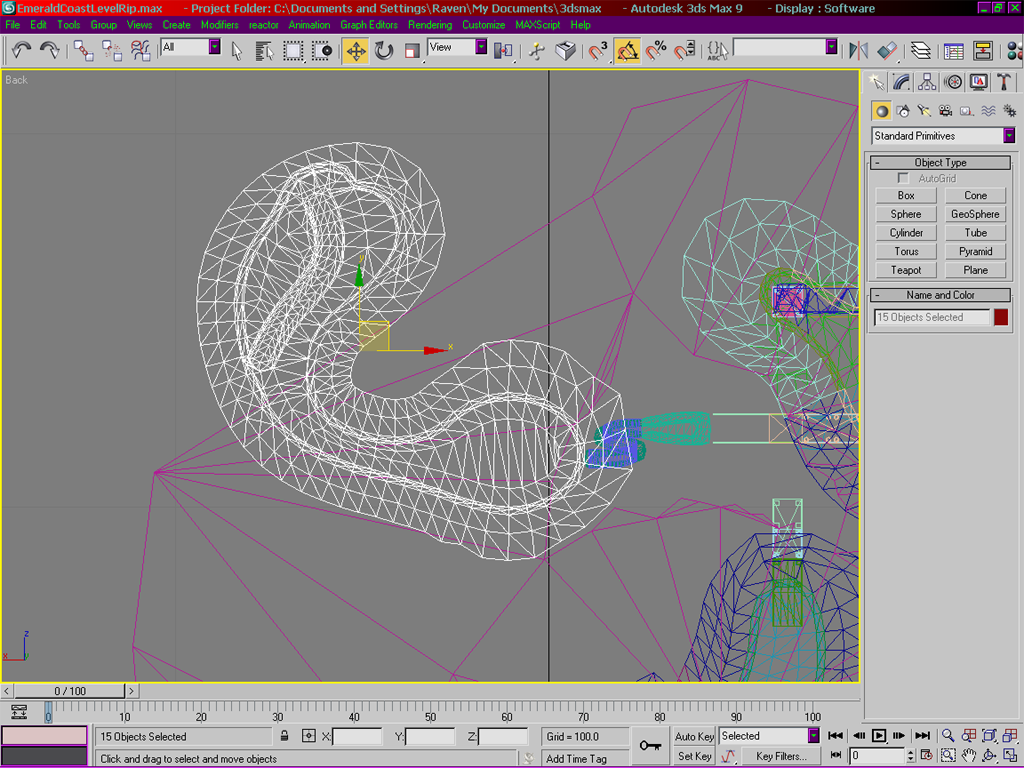
ok, now that we've moved the island's geometry, we'll have to start updating the collision and rendering data. Its tedious and alot of work, but it is all necessary for the edits to show up properly ingame. To keep myself from accidentally moving other pieces of the level, I've frozen everything except for our island. Deselect everything, and then select the dark green part of the island that makes up the tip.
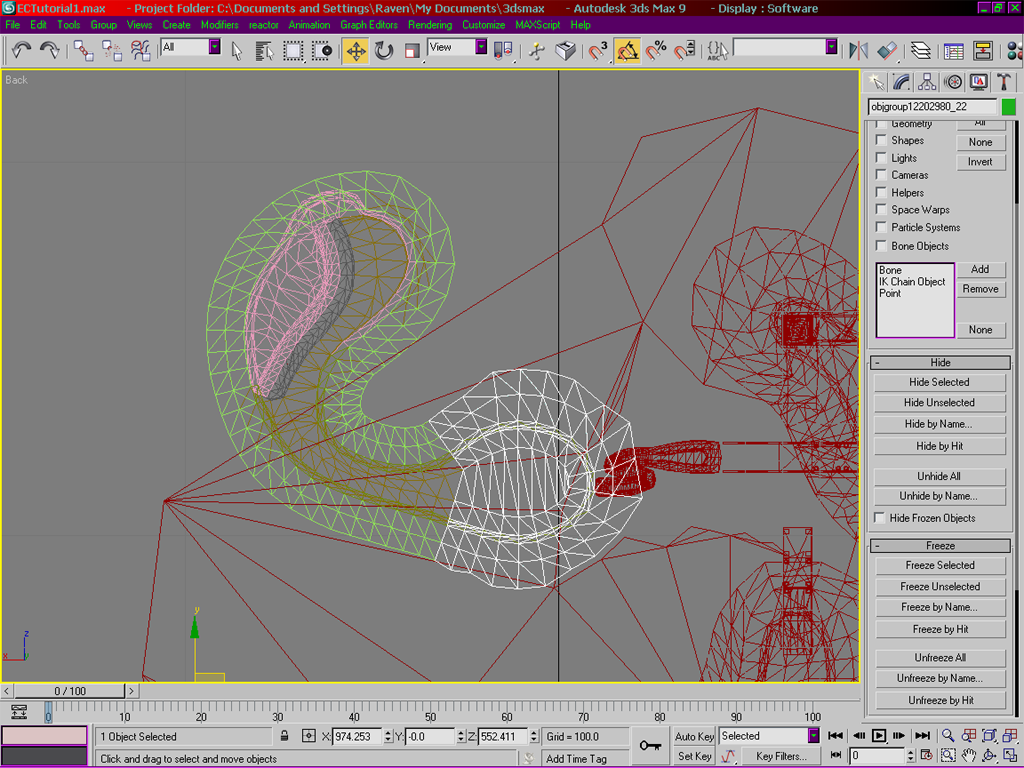
Notice that it is named "objgroup12202980_22" This tells us important information about where to find its data in sonic.exe. To make it easier to remember, lets rename it to "Island1_12202980". Now unfortunately, the level ripper doesn't properly import pivot information, and since we've moved the island, that data would be obsolete anyways, so go over to the hierarchy tab with the tip of the island selected and click the button that says "affect pivot only" and then click "center to object", then turn off "affect pivot only". This helps us establish where the center of the object is, which we'll need for the rendering and collision data. Keep this piece of the island selected (make sure only one part of the island is selected), and go to "file -> export selected". Select "alias-wavefront OBJ" for the file format, and then save the file as "Island1.obj" in the same directory your OBJ2VT.exe program is. Uncheck "rotate model", and make sure the 'scale' field is at 1.0.
Drag Island1.obj onto OBJ2VT.exe, and when prompted, press any key. A new file called out.vt will appear in the directory. This is our vertex tree, and it is full of raw vertex data in a format that sadx will happily accept. Now we need to figure out where it goes. Our object name contains the numbers "12202980", and this is the decimal offset in sonic.exe where the main data for our island object goes. Open sonic.exe in hex workshop. Press "ctrl+g" to bring up the goto box, and enter those numbers. Make sure the radio button for 'dec' is selected.
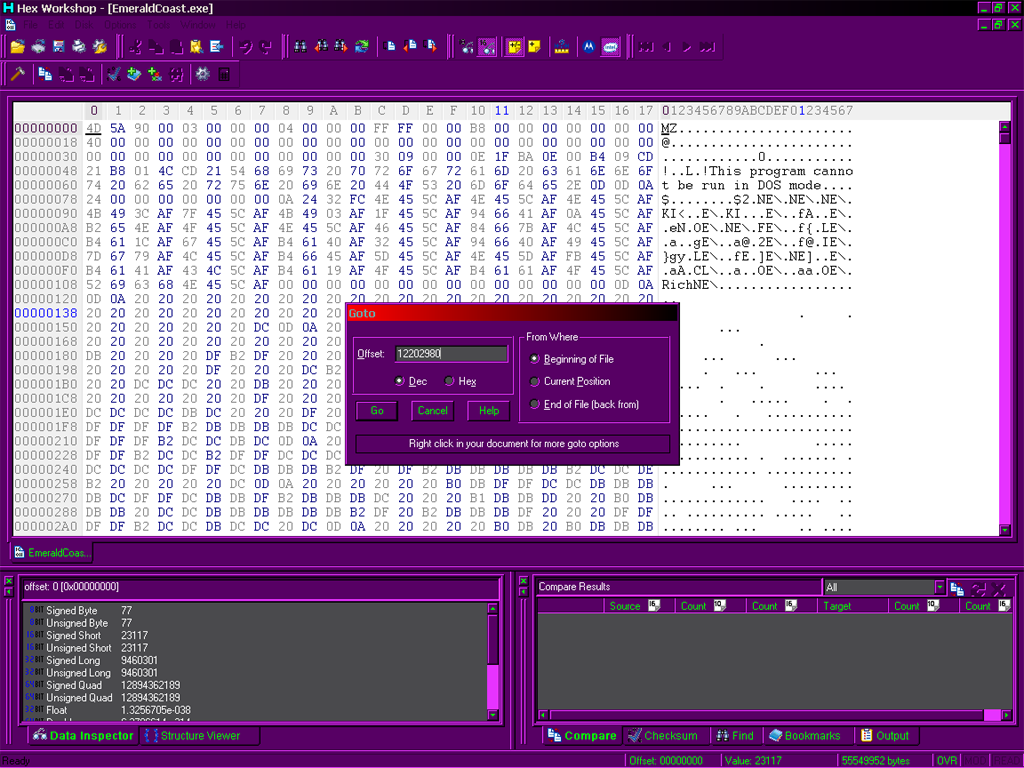
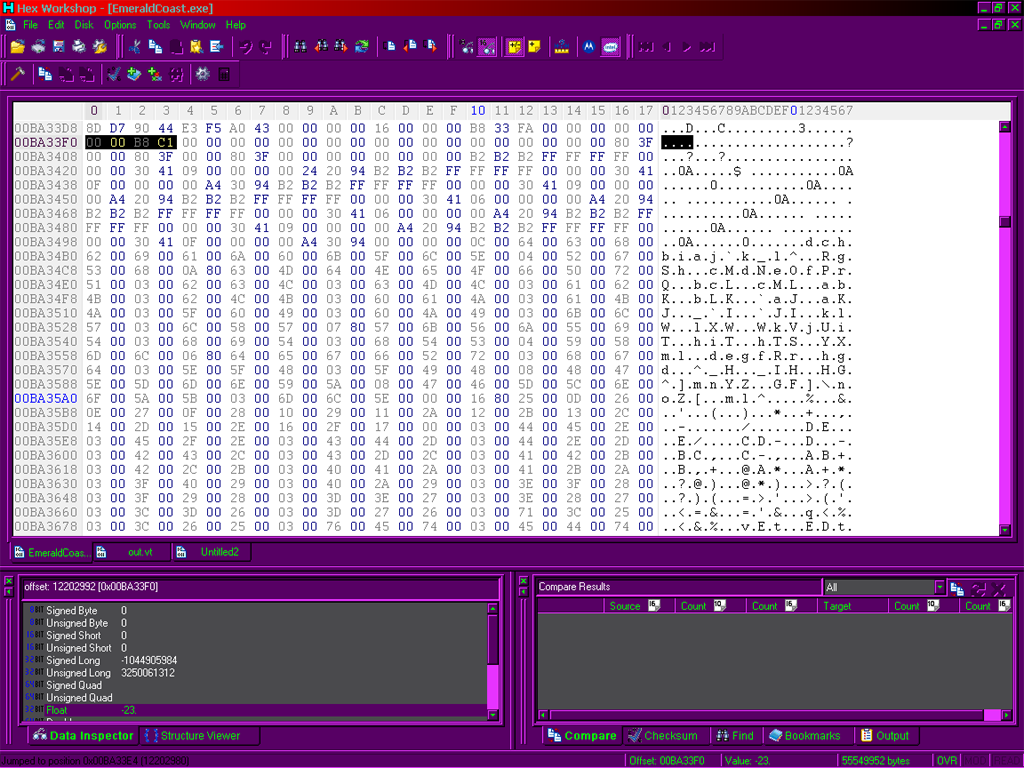
press enter, and it should take you to this location
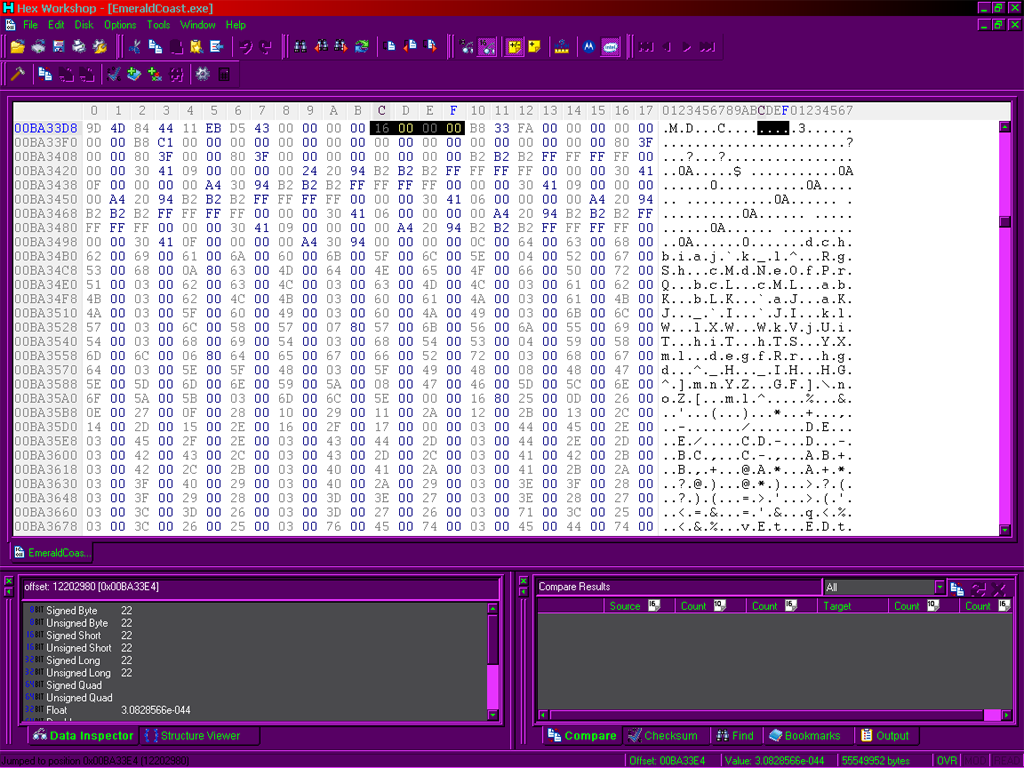
The first 4 bytes I have selected are flags that determine wether or not the model can be transformed by sonic.exe ingame, pay it no mind for now. Go over 4 bytes to where it says "B8 33 FA 00" This is a pointer to the ATTACH structure of the model (outlined in sanik's notes). The attach structure is useful to us for 2 reasons:
- it points to the vertex data, which we need to replace with the contents of out.vt
- and it contains data telling the game where the object can be seen from.
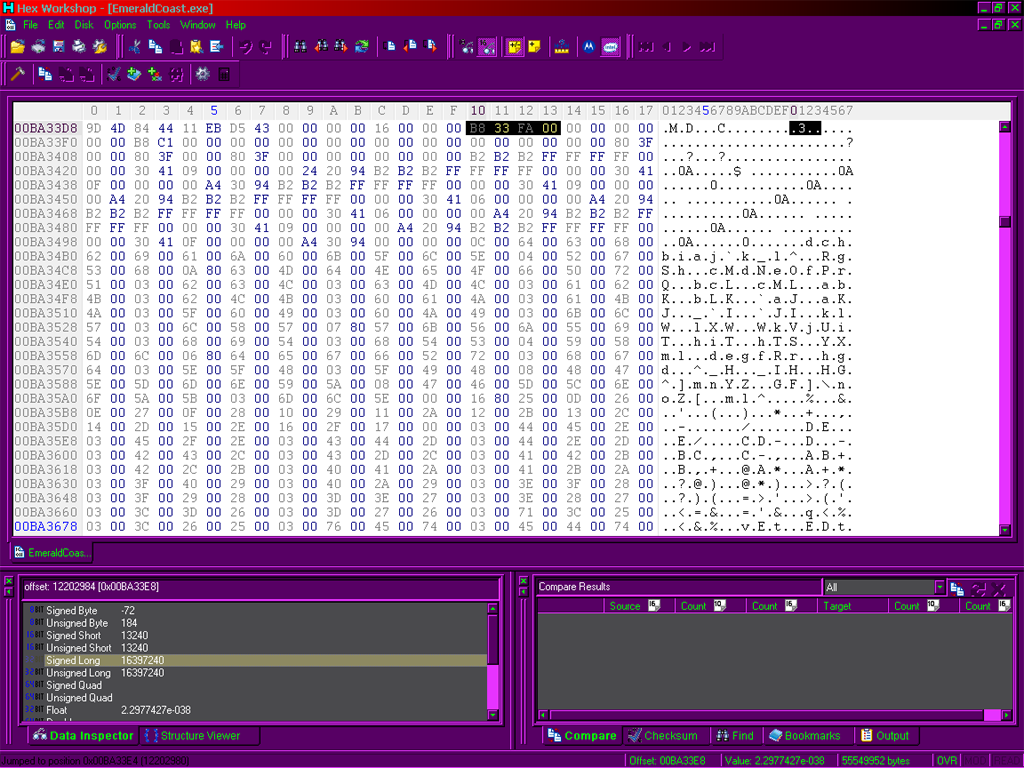
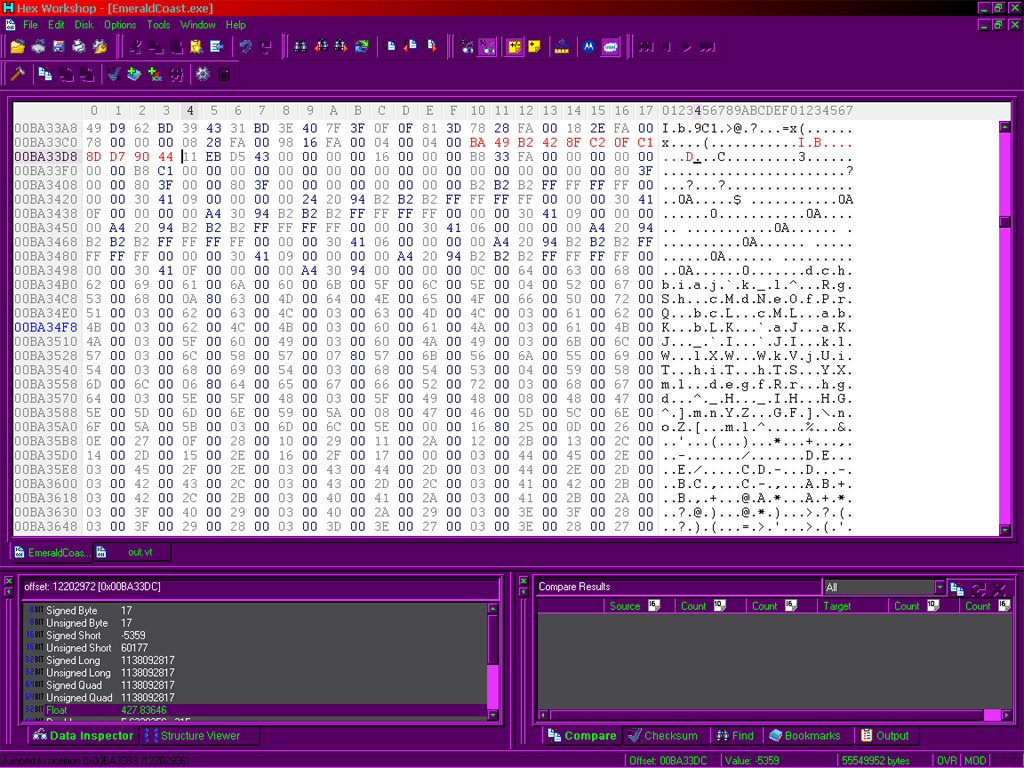
If you look down in the data inspector, you'll see "16397240"; this is how "B8 33 FA 00" translates into a long integer (4 byte whole number). This number tells us where the aforementioned ATTACH structure resides in the game's ram, NOT where it resides in sonic.exe. To find where we need to go in sonic.exe, we will have to do some subtraction. We take the value "16397240" and subtract it from the pointer key "0x400000" (hex), or "4194304" (dec). 16397240 - 4194304 = 12202936. Use ctrl+g again, and this time enter "12202936". It should take you here:
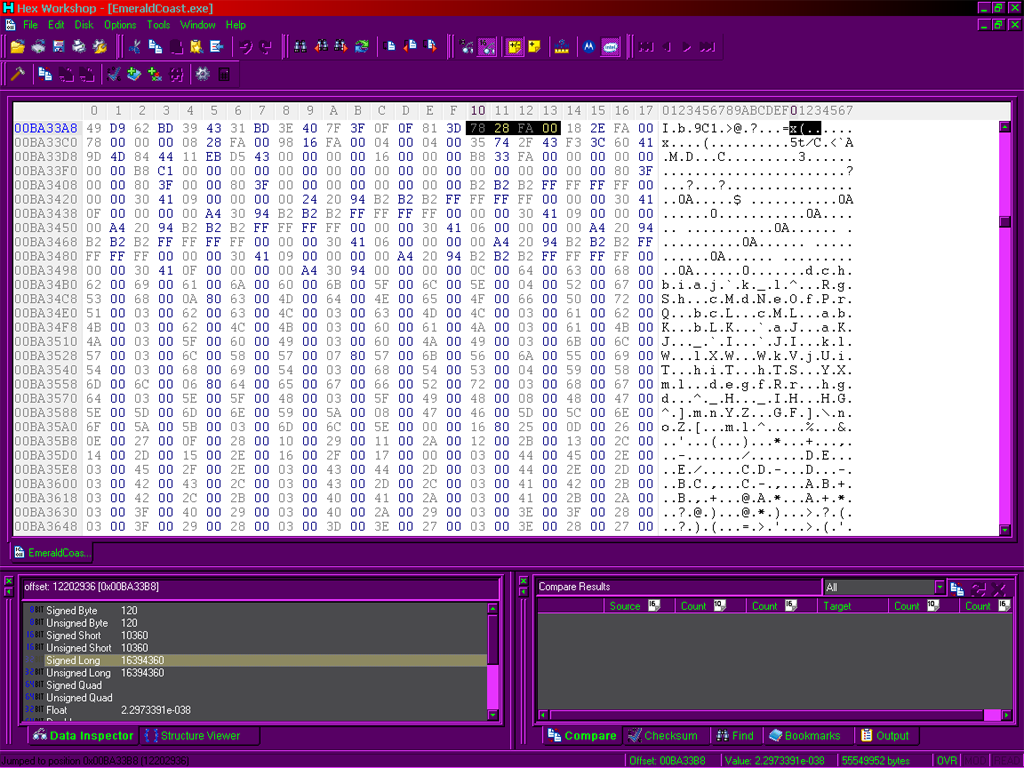
We're not far from where we started, the difference between the OBJ struct and the ATTACH struct is always marginal, but this isn't always the case. Sometimes the game likes to play tricks, so always do your pointer math. Anyways, now that we're at the ATTACH structure, lets take a look around:
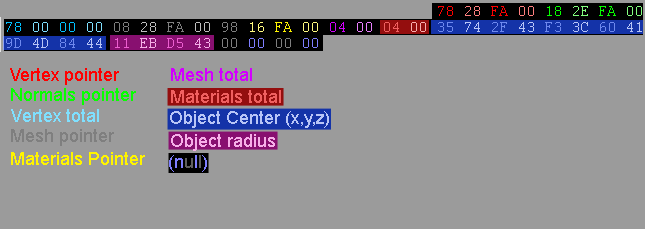
the data inspector reveals that our vertex pointer is "16394360", which after the key comes out to be 12200056. use ctrl+g again, and after you've arrived at "12200056", open out.vt
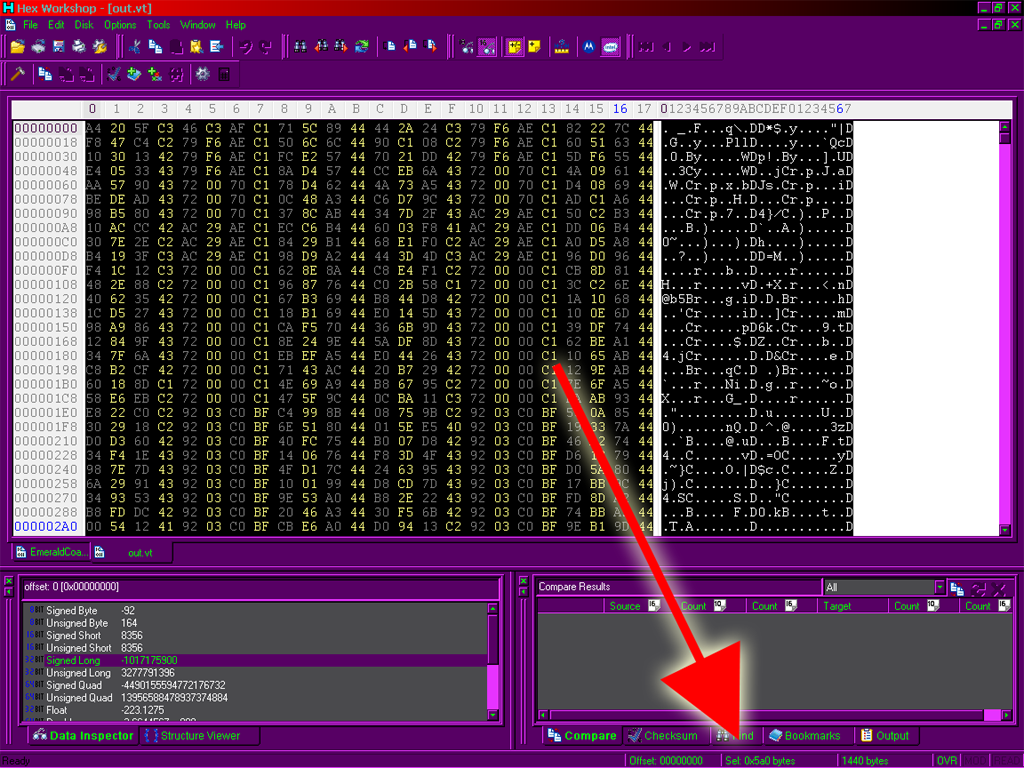
Selecting everything in out.vt reveals it to contain a total of 0x5a0 (hex) bytes. Copy the contents of out.vt, then go back to "12200056" in sonic.exe. Click select block, and when the box comes up, enter 0x5a0, making sure the 'hex' radio button is selected.
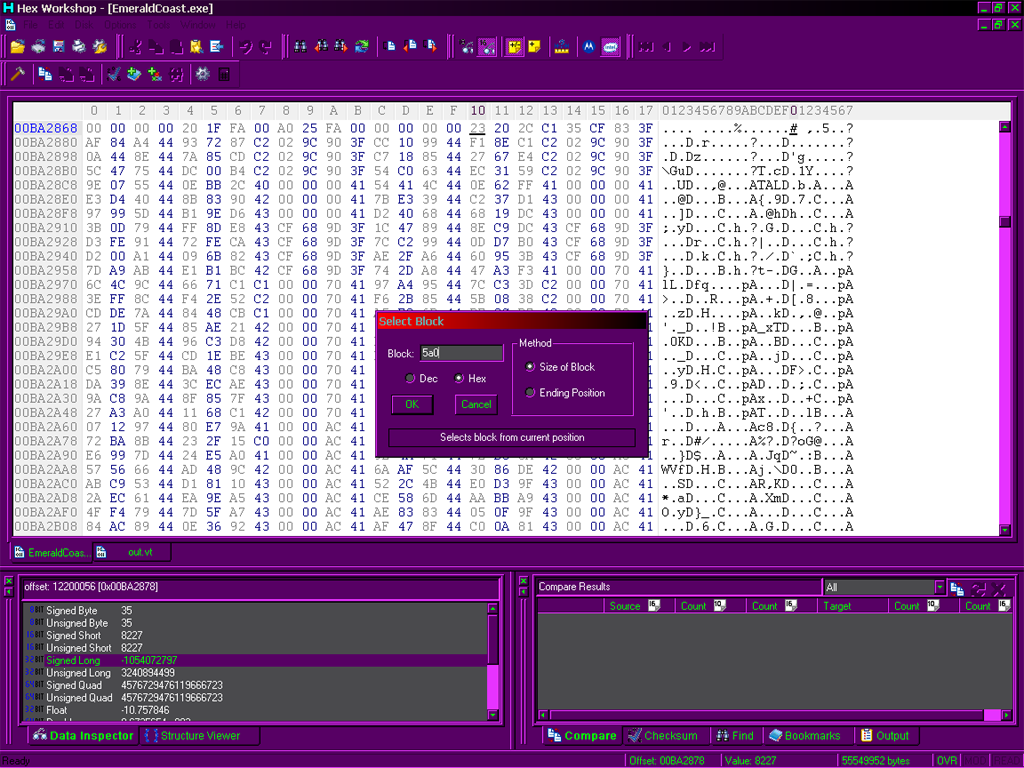
Press enter, and then paste. If any byte shifting occured, you messed up. Don't save just yet, go back to the ATTACH structure.

go to the object center, and select the first 4 bytes. Now go back to 3dsmax and select the x origin of the object.
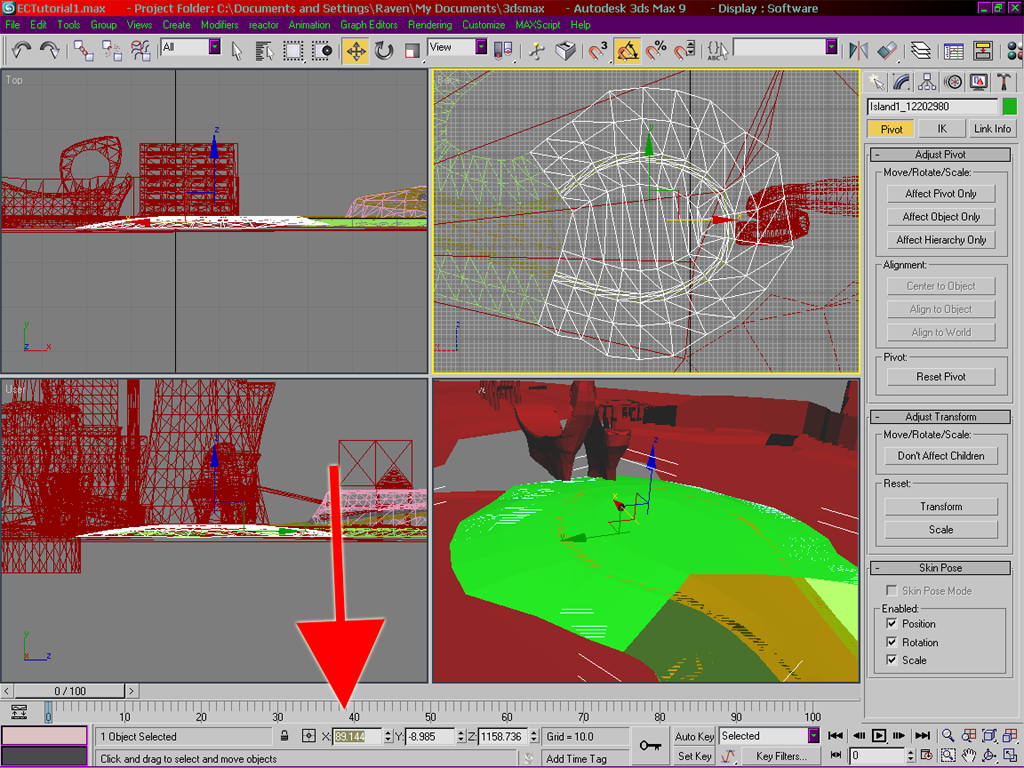
copy this number, then run back to hex workshop and paste that number into the data inspector under the 'float' entry.
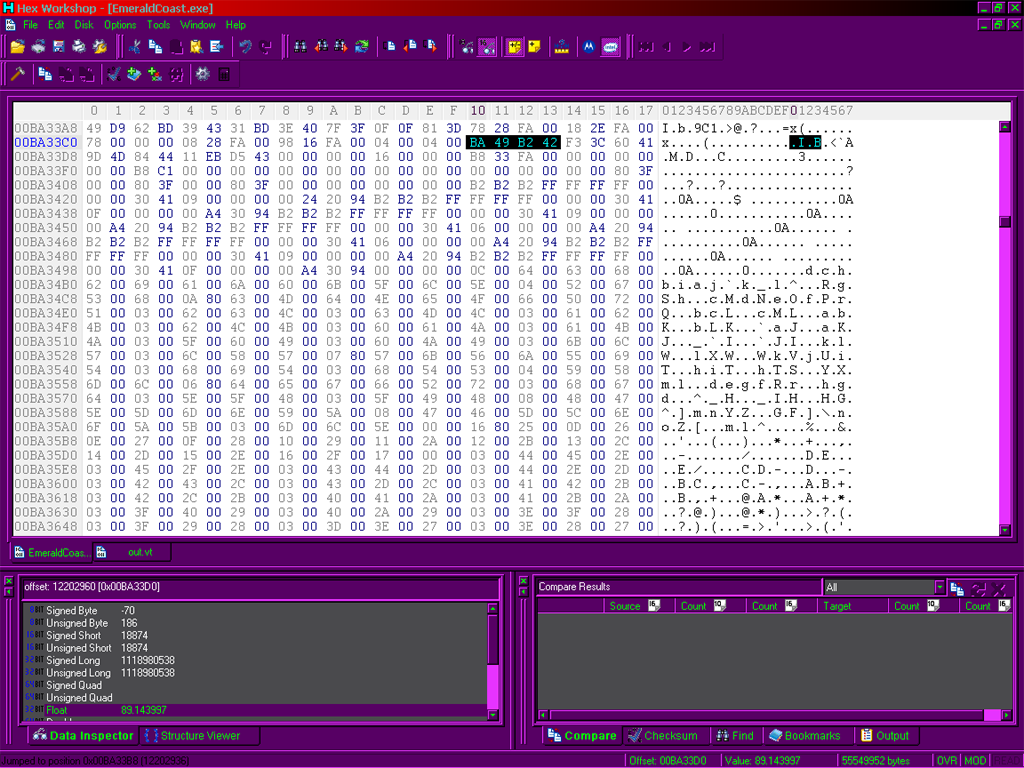
repeat this with the y and z coordinates, until your attach struct looks like this:
We're almost done with the attach struct, but we need one last piece of data to tell the game how big our island piece is. Go back into 3d studio, and create a new sphere at the same origin point as your island piece. Expand its radius using the radius handle (not the scale tool) until the sphere barely encompasses all of the island.
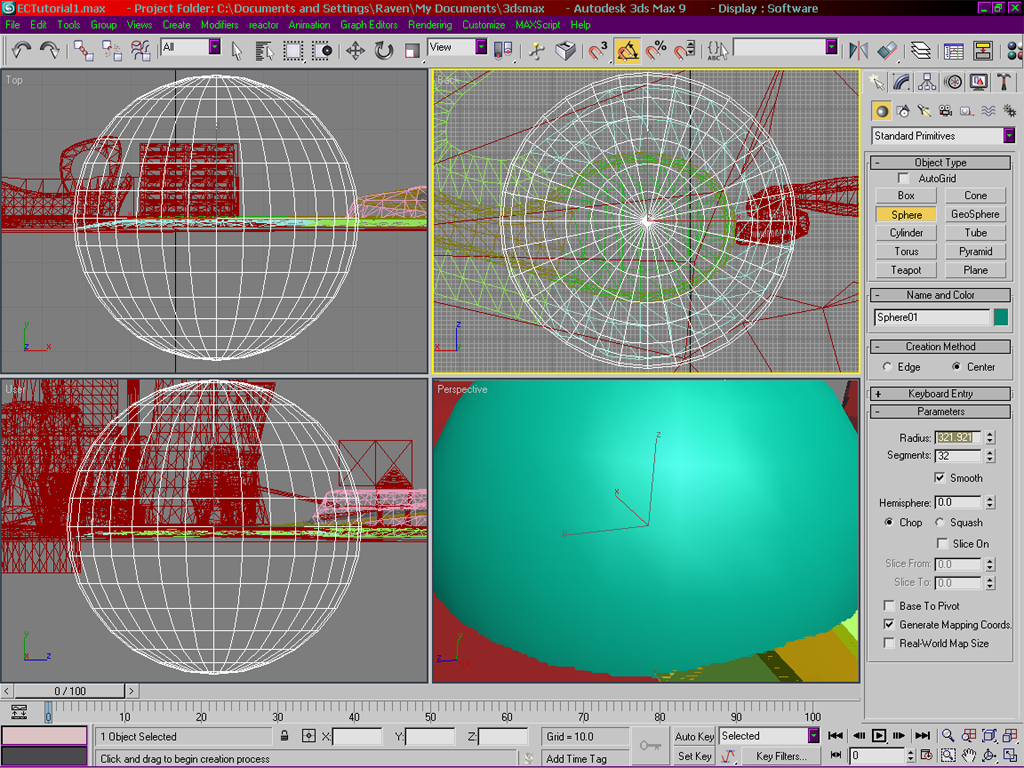
copy this value, and paste it into the the last remaining entry (object radius), and your attach struct should look like this:
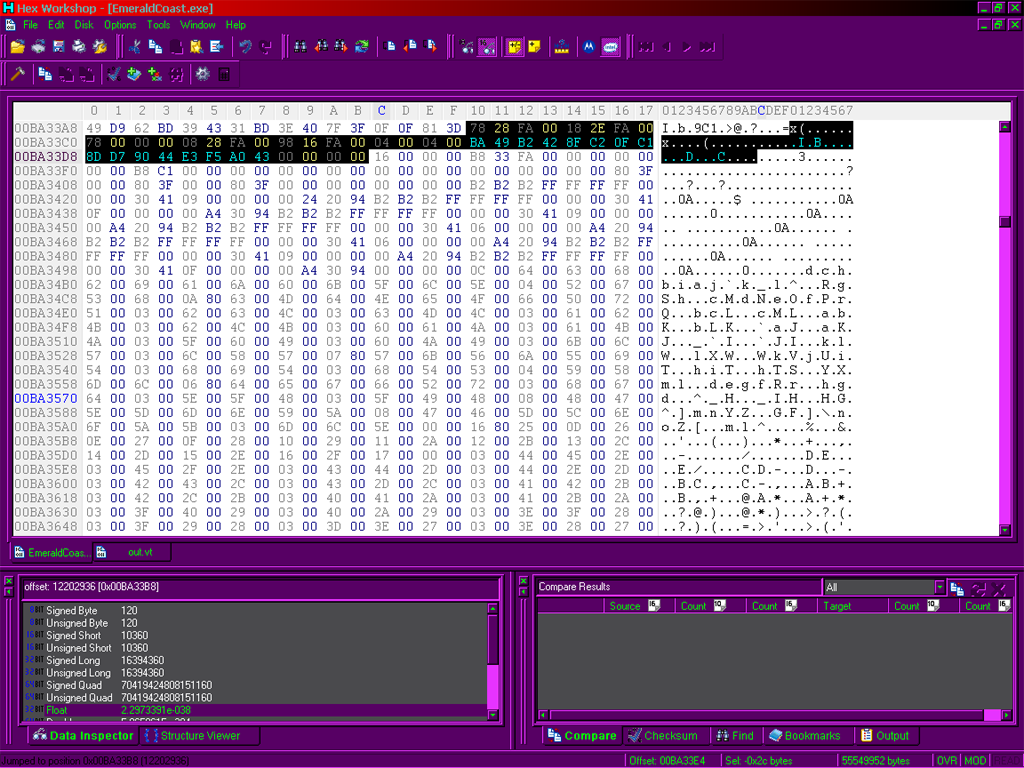
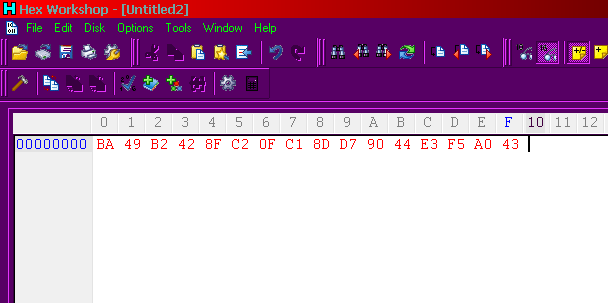
you're almost there! If you were to save sonic.exe now, your object would appear exactly as it is supposed to, but you would fall through any part that wasn't in the same area as before. Select the rendering data you added to the ATTACH struct and paste it into a new file, like here:
Now we have to find some data that we can't find from the OBJ or ATTACH structs - the COL struct. To find the col struct we go back to our original numbers ("Island1_12202980" if you forgot), and instead of subtracting our key, this time we ADD it. 1220298 + 4194304 = 16397284. Now this number we just got isn't actually going to tell us anything, because we already are at the place it is telling us to go. So instead of going to 5414602, we find it by pressing ctrl+f. Set the type to '32 bit unsigned long', and then paste '16397284' into the value box. If hex workshop asks you to continue again at the beginning of the file, say ok. It should find a result at 11101328 (dec). We are roughy halfway through the COL struct.
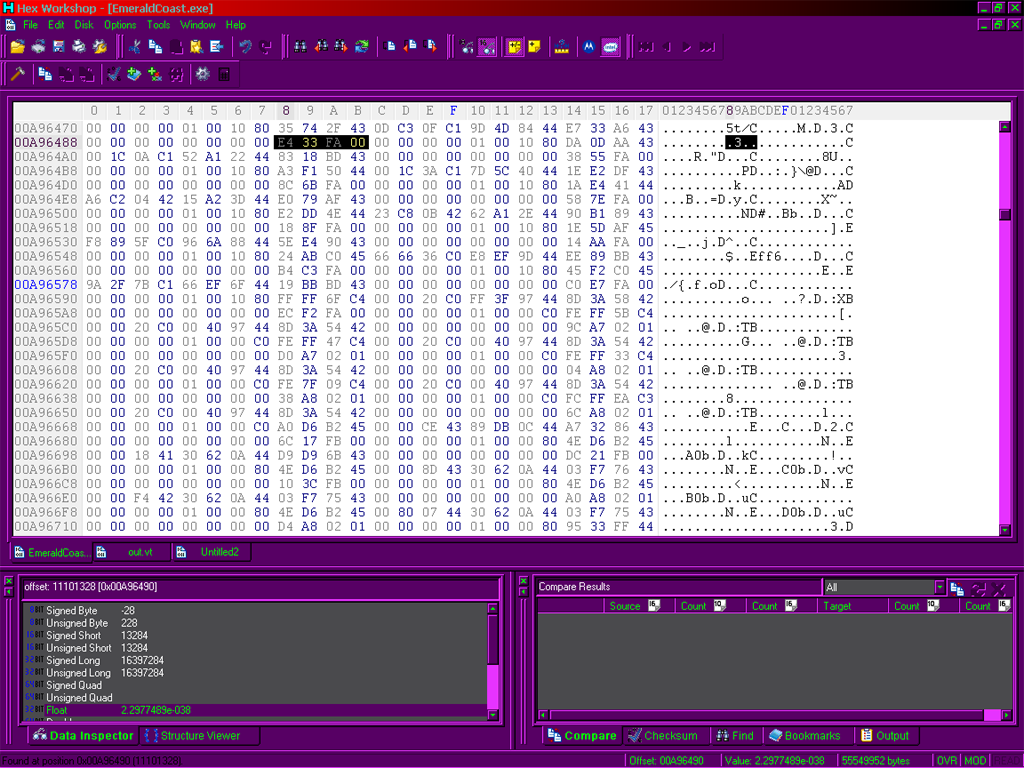
As a general rule, col structs where the object is meant to be visible end in 80. We can use this to find the whole struct, as pictured here:
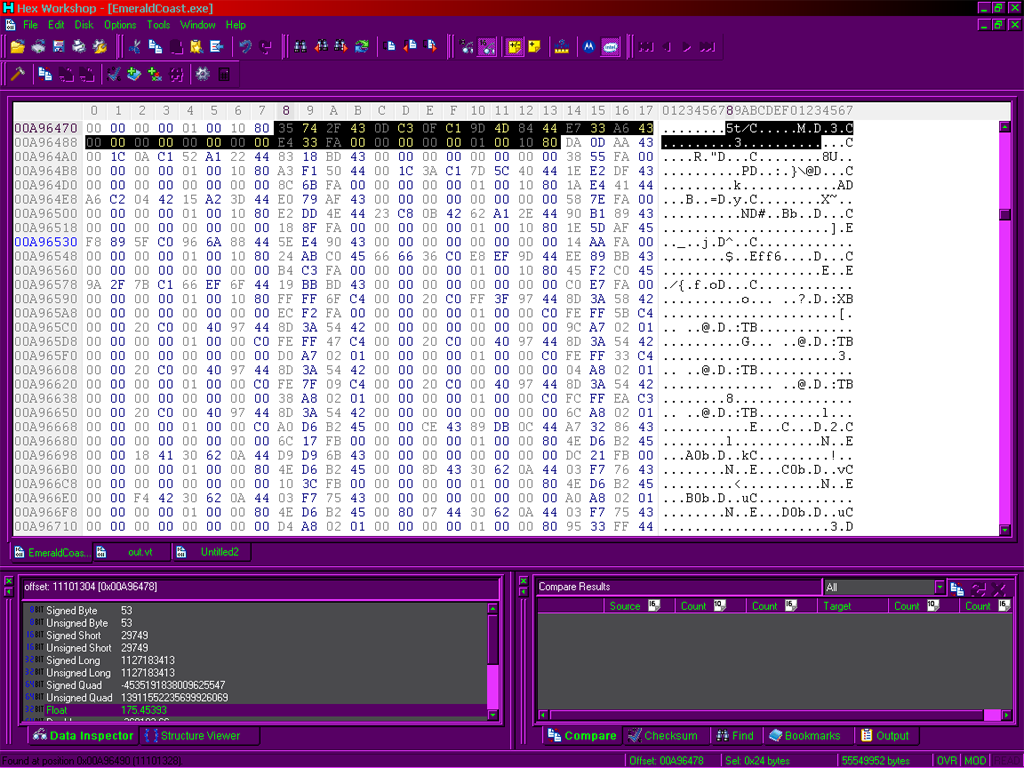
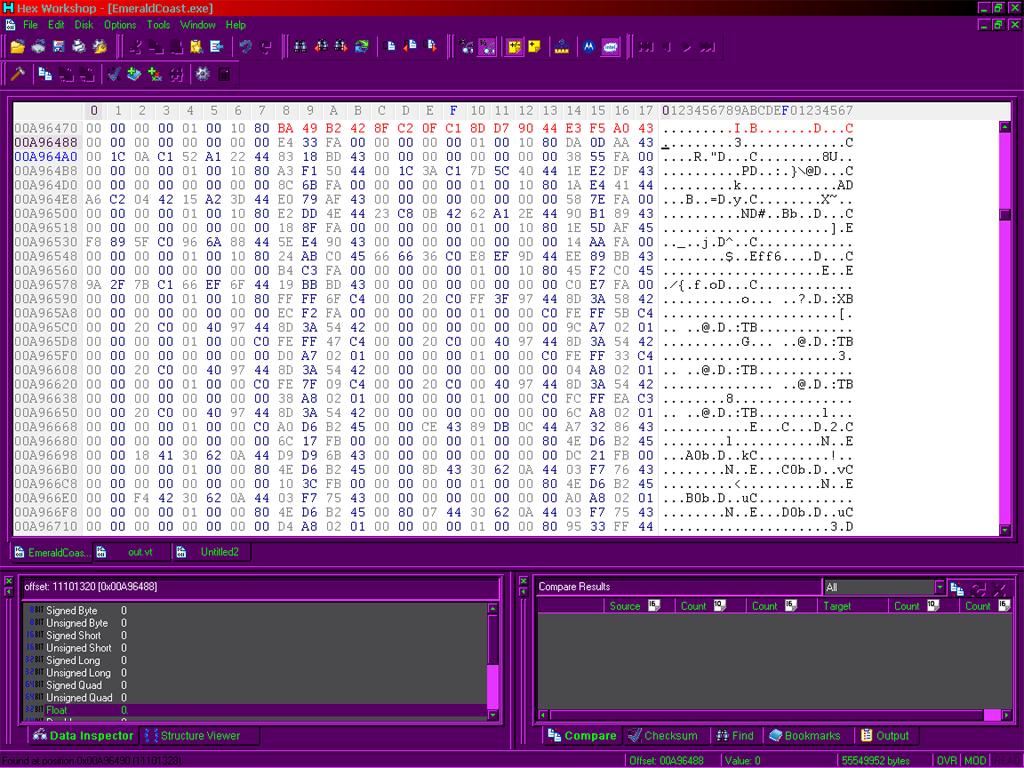
Select the first 0x10 bytes of the struct and replace them with the radius data you entered into the ATTACH struct earlier, like so:
Now save your sonic.exe as EmeraldCoast.exe, and run it. Upon loading emerald coast and going to the loop, you should see this:
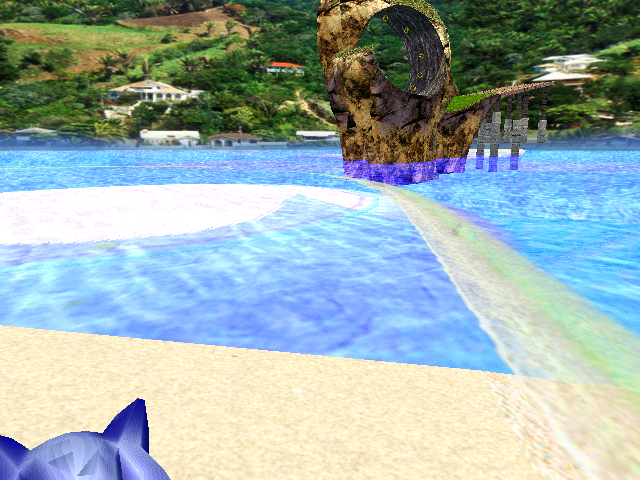
Its a little low, but shouldn't it be right where we placed it? Not quite, you see there are some coordinates in the OBJ struct that move the model an additional distance - this is for objects that are used more than once, or possibly for other reasons. Remember how the OBJ struct had an attach pointer? Well right after that are 3 more floats that tell the game how far from the vertex data to render the object. In this case, we'll need to zero out this data. Open your EmeraldCoast.exe in hex workshop again, and use ctrl+g to go to 12202980. Here we find the offending value (-23.0)
zero out that number, save and re-load. You should get this:
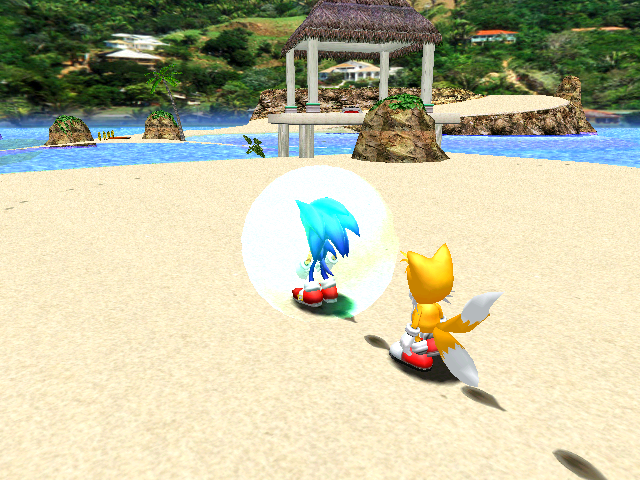
Now thats more like it! You'll notice you still can't move past the old barriers though. We've moved them in 3d studio but not in sonic.exe. You have two options here:
- get rid of them altogether by making their mesh total in the attach struct 0
- move them using the process above to match their new location.
Anyways, repeat the process for all 15 of the level pieces if you so desire. It will help you to take notes so you can quickly jump to any OBJ, ATTACH, COL, or VERTEX struct you need to in case you need to change something. My list entries for this island are here.
and lo, a level was changed:
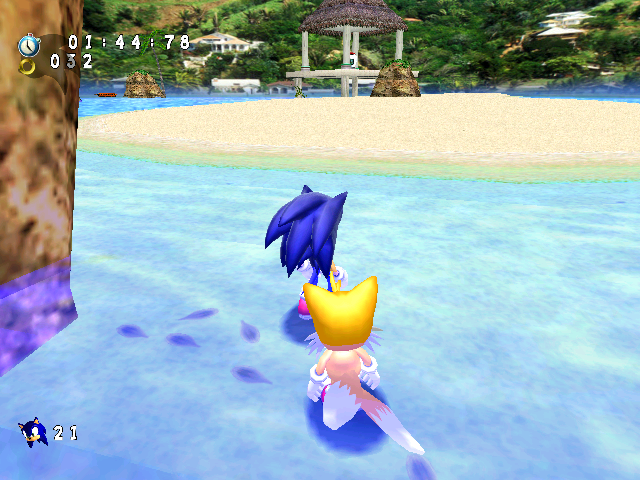
Its alot of work, and it took me roughly an hour. I kind of cheated (I used one sphere data for all of the ATTACH and COL structs, because I accidentally corrupted the exe while working, and had to restore a backup), but it works ingame. You can download my finished 3dsmax file here. And if you get lost, or need help figuring out what data does what, you can download my EmeraldCoast.exe, and use Hex workshop to do a file compare on the original executable vs. this one. As you've no doubt noticed, the camera is now totally out of whack with the level. For now, just use free cam. I'll do a camera file tutorial sooner or later.